
Traditional Peanut Paçoca Recipe the only recipe you need!
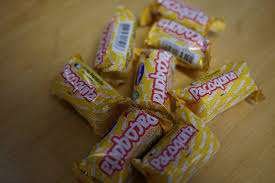
This recipe balances the ingredients to achieve the authentic texture and flavor of “paçoca caipira,” which is perfectly dry and melts in your mouth.
Prep time: 20-25 minutes Yield: About 500g
Ingredients:
- 250g of toasted, skinless Peanuts
- 125g of granulated or refined Sugar
- 125g of raw, fine Cassava Flour (in Brazil, “farinha de mandioca fina” or “tipo biju” is common)
- 3g of Salt (approximately one generous pinch)
Equipment:
- Food processor or a powerful blender
- Small square or rectangular pan, or specific paçoca molds
Instructions:
-
Prepare the Peanuts: Even if you bought already toasted peanuts, place them in a skillet over low heat for 2-3 minutes. This warms them up, helping to release their natural oils and intensify the flavor, which is crucial for getting the mixture right.
-
Process the Ingredients:
- Place the still-warm peanuts and the sugar into the food processor or blender.
- Use the “pulse” function several times. The goal is to grind the peanuts into a coarse, moist crumb. Be careful not to over-process, or you will end up with peanut butter. Ideally, you should still see very small pieces of peanut.
-
Add the Flour and Salt:
- With the peanut and sugar crumb ready, add the cassava flour and the salt.
- Pulse again, just enough for all ingredients to be homogeneously mixed. The mixture should look like damp sand.
-
Check the Consistency: Grab a handful of the mixture and squeeze it firmly in your hand. If it forms a cohesive clump that doesn’t easily fall apart, it’s at the right point. If it seems too dry, you can pulse it for a few more seconds to let the peanuts release a bit more oil.
-
Shape the Paçoca:
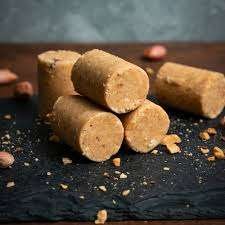
- Method 1 (In a Pan): Pour the mixture into a small rectangular or square pan. Using the back of a spoon or the bottom of a glass, press the mixture down VERY firmly to compact it well. Let it rest for about 15 minutes to set. Then, cut it into squares or rectangles of the desired size.
- Method 2 (Individual Molds): If you have metal rings or specific paçoca molds, fill them with the mixture, pressing down vigorously to compact. Unmold carefully.
-
Finishing: Your paçoca is ready! It can be eaten immediately.
Tips for a Fantastic Paçoca (Secrets and Details)
To go beyond the basics and ensure an exceptional result, pay attention to these details:
-
Peanut Quality is Everything: Use good-quality, fresh peanuts that don’t have a bitter taste. The quick toasting in the skillet before processing is not optional—it’s the secret! It intensifies the flavor and releases the natural oil, which is the “glue” for your paçoca.
-
The Grinding Point is Critical: The most common mistake is over-processing and ending up with a paste.
- Use the “Pulse” Function: Go slowly. Give it short bursts and check the texture.
- The Ideal Point: The mixture should resemble “wet sand” or a very moist crumb, with tiny bits of peanut still visible. It’s this texture that gives traditional paçoca its subtle crunch.
-
Don’t Underestimate the Salt: The pinch of salt isn’t there to make it salty, but to enhance and balance the flavors. It cuts through the sweetness of the sugar and makes the peanut flavor shine. It’s an essential ingredient for flavor complexity.
-
Compaction Works the Magic: The paçoca will only hold its shape if it is pressed very well.
- Use Force: Don’t be afraid to use your body weight to press the mixture into the pan with a spoon or the bottom of a glass. The more compact it is, the more perfectly it will hold its shape when cut.
- Let It Rest: After pressing, letting the mixture “settle” for 15-20 minutes before cutting helps the oils distribute and makes the paçoca more stable.
-
The Choice of Flour: Use a raw, fine cassava flour. A coarse or pre-toasted flour will give your paçoca a sandy and overly dry texture.
Creative Recipe Variations
Once you’ve mastered the basic recipe, you can start experimenting:
- Chocolate Paçoca: Add 15g (2 tablespoons) of unsweetened cocoa powder along with the flour for an intense chocolate flavor.
- Paçoca with Powdered Milk (Brazilian “Leite Ninho” Style): For a creamier, smoother version, replace half of the cassava flour with powdered milk. Use 65g of cassava flour and 60g of powdered milk.
- Crunchy Paçoca: After processing all the ingredients, manually mix in 50g of coarsely chopped toasted peanuts. This will add an incredible extra texture.
- Coffee Paçoca: Add 1 teaspoon of instant coffee powder to the mixture. The bitterness of the coffee creates a sophisticated contrast with the sweetness.
- A Touch of Spice: A pinch of cinnamon powder or cardamom along with the dry ingredients adds a layer of warm, aromatic flavor.
Creative Uses for Your Homemade Paçoca
Paçoca is incredibly versatile! Crumble it up and use it as a magic ingredient:
- On Açaí Bowls: This is an unbeatable classic. Generously crumble it over your açaí bowl. The sweet/salty contrast of the paçoca with the flavor of açaí and fruits is perfect.
- In Cheesecakes and Pies:
- Crust Base: Grind the paçocas into a fine crumb, mix with melted butter, and use it to line the bottom of a cheesecake or sweet pie, replacing the traditional graham crackers.
- Topping: Simply crumble it over a finished cheesecake to add flavor and a crunchy texture.
- On Banana Splits and Ice Cream: Elevate your banana split to another level! Sprinkle crumbled paçoca over scoops of ice cream (especially vanilla, cream, or chocolate) and the banana. The texture and peanut flavor are a perfect complement.
- Cake Filling and Topping (Paçoca Cake):
- Mix crumbled paçoca into your favorite white brigadeiro or dulce de leche filling for an incredible cake filling.
- Use it to decorate the frosting of a cornmeal, carrot, or chocolate cake.
- Brigadeiro de Paçoca: The best of both worlds! Add 2 to 3 crumbled paçocas to a white brigadeiro mixture while cooking. Then, roll the finished brigadeiros in more crumbled paçoca instead of chocolate sprinkles.
- With Fruits: For a quick and delicious snack, mash a banana and sprinkle paçoca on top, or add it to a fruit salad.
- In Milkshakes: Blend 2 or 3 paçocas with vanilla ice cream and milk for a creamy and unforgettable paçoca milkshake.
- In Yogurt with Granola: Mix crumbled paçoca into your plain yogurt for a breakfast or snack full of texture and flavor.